Guide
How to Win at Mahjong Solitaire
Good Mahjong Solitaire strategy starts with two questions: which pair opens the most useful tiles, and would removing it leave another pair trapped? These two playable examples show how to use what you can see, and where hidden tiles still leave room for luck.
Both examples start from a fresh deal, with no setup moves. A tile is playable when nothing covers it and at least one of its left or right sides is open. Need a refresher? Read how to play.
1. Prefer the pair that opens the board
Before matching, look at what each choice will free. Opening a stack or the end of a blocked row gives you more tiles to work with. Sometimes the benefit takes another move: look for a short sequence that opens the crowded part of the board.
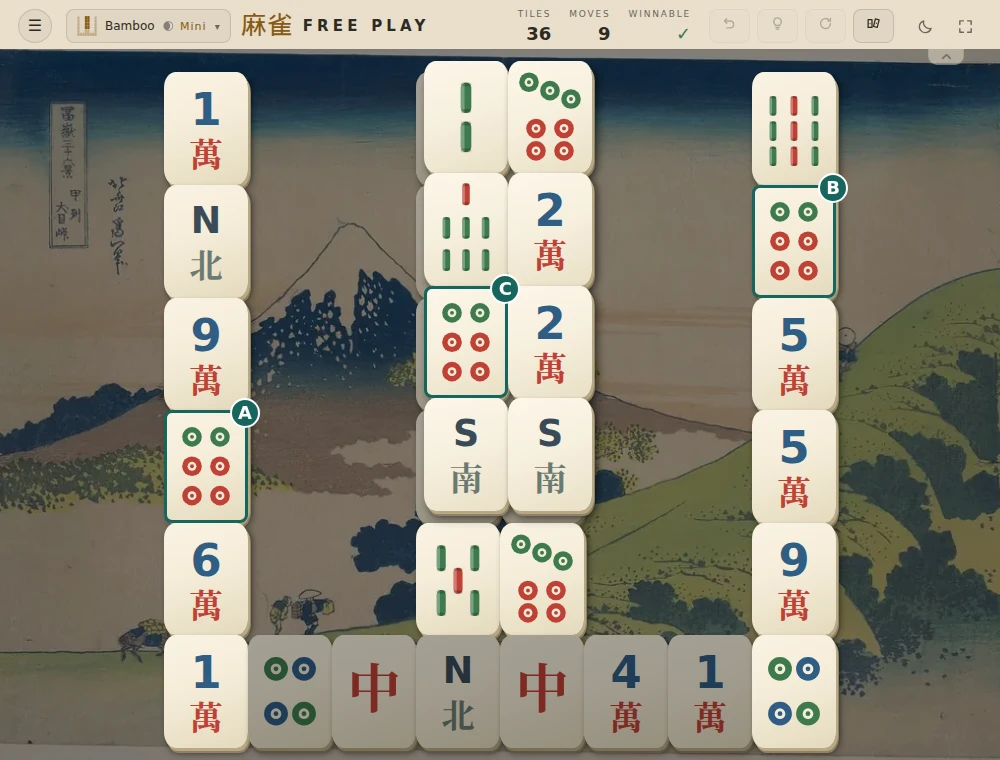
Here is an example deal on the Bamboo layout. Three Six of Circles are free: A on the far left, B on the far right, and C on the central stack.
Use the information you can see
Removing A + B frees no additional tiles. Removing A + C frees the tile beneath C. You do not need to know that hidden tile’s face to prefer the second move: it opens a new option, while the first move only reduces the number of tiles on the board.
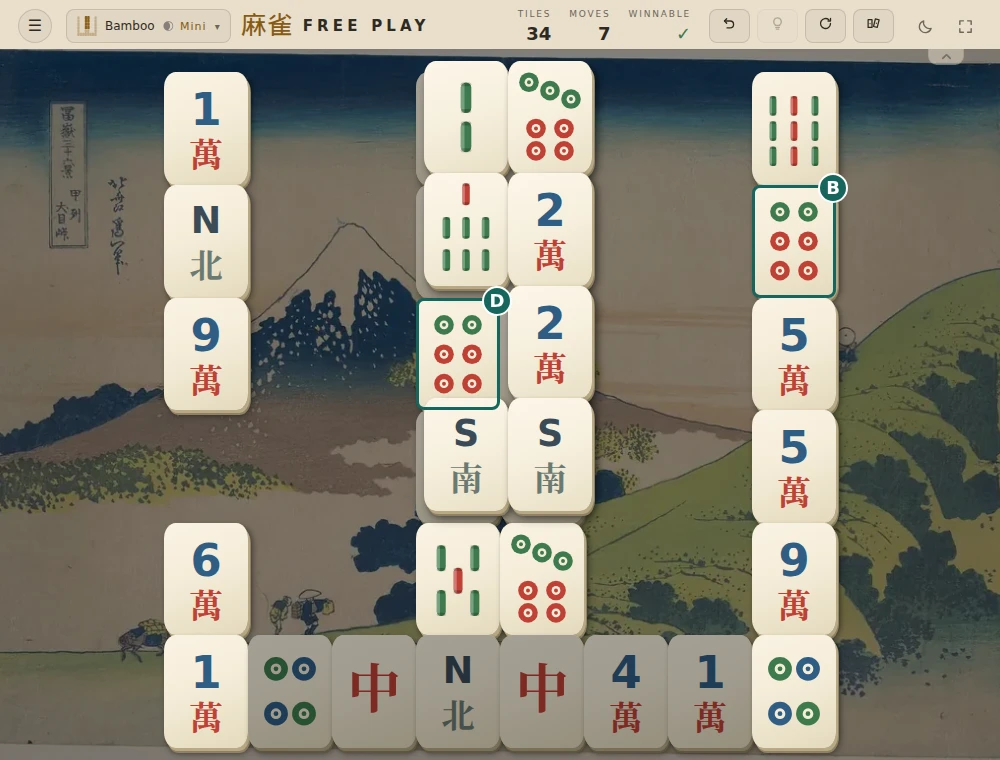
Try A + C. The newly exposed tile, D, turns out to be the fourth Six of Circles. B is still available, so you can now match B + D.
What if you choose A + B?
Reopen the board and try the two outside copies instead. The game displays STRANDED: the only two Six of Circles left are C and the tile directly beneath it. Neither can be removed without the other. Other matches still exist, but the board can no longer be cleared.
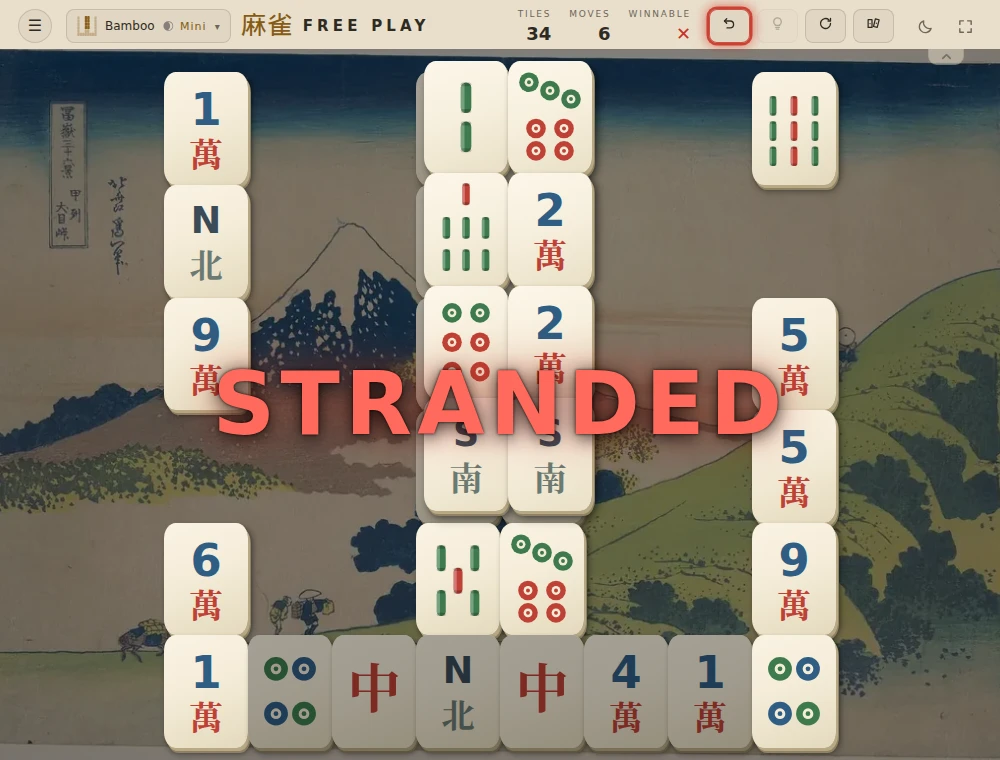
The useful strategy was visible before the move: include C because it opens another tile. The identity of D was hidden, so you could not have proved that A + B would strand this particular deal just by looking at the opening.
2. Keep a partner for a visibly trapped tile
Opening more tiles is a useful rule of thumb, not a guarantee. Before spending a pair, check the other copies you can see. If one covers another matching tile, they will need outside partners; leaving those two as the last pair makes the board impossible.
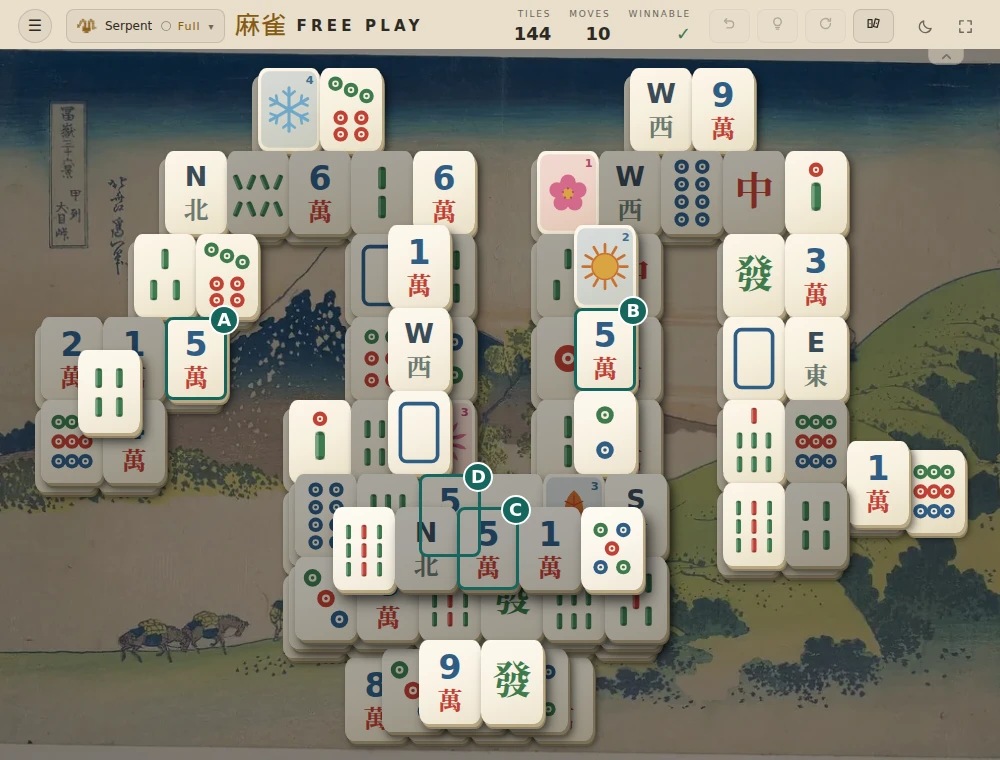
In this example deal on the Serpent layout, find the four Five of Characters tiles, marked A, B, C and D below. A and B are free. C is blocked at both sides in the raised bottom row, and D is partly covered by that row. The exposed upper part of D shows its five, so you can identify it before moving anything.
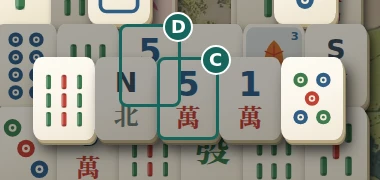
Why opening three tiles is still the wrong move
Matching A + B would free three other tiles. That looks productive, but it uses up both outside Fives. Even if you then clear C’s neighbours, C will still cover D. D cannot be selected while C remains, and C will have no matching partner except D.
This time the warning is predictable from the visible tiles. Keep A and B for now, and work on opening C’s row first.
A route into the row
From the opening, match the Nine of Bamboo at the left end of the raised bottom row with its free partner on the right-hand branch. This exposes a North Wind beside C. Match that North Wind with the free North Wind near the upper left. C now has an open left side: pair it with A, leaving B available for D later.
You have opened the stack without leaving the two overlapping Fives as each other’s only partners. Unlike the first example, you can explain why A + B fails without guessing a hidden face.
3. Allow for information you cannot see
Good strategy improves your chances; it does not reveal covered tiles. Sometimes the move that opens the most promising part of the board exposes a dependency you could not know about, and the position turns out to be stranded. There is still an element of luck in what lies underneath.
Look for the visible traps first, then choose the move that opens useful options. If hidden information defeats that choice, use Undo and try another route. Every Mahjong Tide deal starts with a solution, but that does not mean you can always identify it from the faces currently visible.
For the distinction between a legal match and a winning line, read what solvable means. To explore how stacks and rows change your choices, see the layout guide.